Sunday, 14 December 2014

The famous Ginger Cookie

Old Fashioned Ginger Biscuits

Well, it's been 2 weeks since we've moved into our rental home here in Wellington, NZ. 
So, so many boxes are still unopened - stored in the garage. I have no clue where my recipe books are... and my mind, hands, mouth, nostrils (hehe) want to bake something!!! When I REALLY feel like cooking or baking something, I taste it in my mouth looong before the finished product ;-). I'm sure you know what I'm talking about!!

No recipe book - no problem - Google!

I found this website www.pinkpolkadotfood.com. And there it was... Ginger Cookies that you roll in sugar before baking them! They are the best!
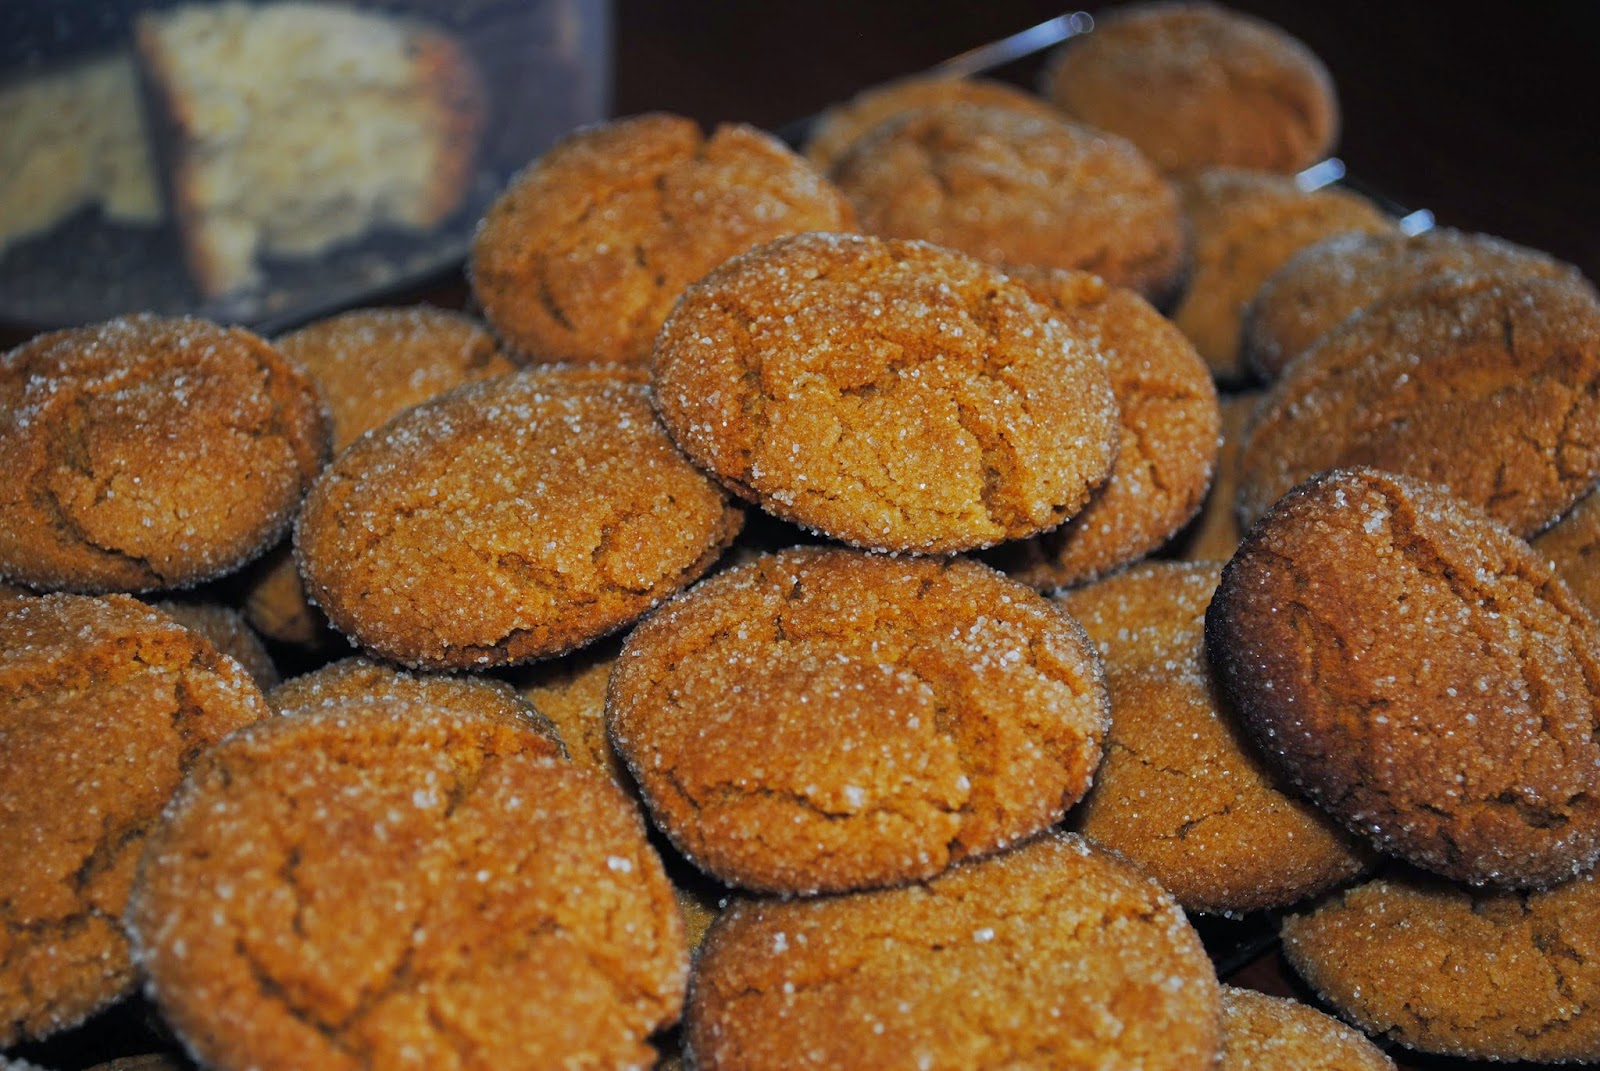
Presenting: The Ginger Cookie


Ingredients:

  • 230g butter
  • 250g sugar
  • 250ml golden syrup
  • 10ml bicarbonate of soda
  • 15ml milk
  • 550g cake flour
  • 5ml salt
  • 60ml ginger powder
  • extra sugar (optional) 

Method

Pre-heat the oven to 180ÂșC and butter 2 to 3 baking tins.
Mix the butter, sugar and golden syrup together until well combined.
Add the bicarbonate of soda to the milk and mix into the butter mixture.
Sift the cake flour, salt and ginger powder together and add to the butter mixture. Mix until it forms a dough.
Roll the dough into small balls. (Maybe slightly smaller than a ping-pong ball).
Roll into the sugar to be covered (optional).
Place on the buttered baking tins ( or baking sheets) and bake in the pre-heated oven for approximately 10 minutes or until golden brown.
Cool down for 2 – 3 minutes and transfer to cooling racks.
Once cooled down completely store in an airtight container. 
Ben and Ingrid helping mom bake. I will have to find their aprons!

Roll the little balls in sugar before baking.
Perfect for Christmas. Enjoy!

Thursday, 30 October 2014

Baked Supper

Vienna and Bread Bake

Wow, it's been a while since I posted something.... not that I didn't cook - NO WAYS! 
We were actually busy moving! (Check out my other Blog: "thelouwshuffle").

Quite a thing moving from one country to another!!

Anyways, I made this sausage dish before leaving South Africa. I used a recipe, but I must say that I thought it to be a bit "bland". I will make it again, but I will rather use Boerewors or Chorizo, Smoked Sausage or Salami chuncks... something with some spice.
But, I must mention that my kids loved it ;-)

What you will need:

One large dish (approx. 15 x 25cm) or smaller dishes to serve per person - your choice.

* 5 or 6 slices of bread ( 1-2 day old)
* +- 500g Sausage of your choice
* Loads of grated cheddar cheese
* 2-4 eggs (depends on the size of your dish)
* Milk
* 1/2 cup chopped parsley
* Salt and pepper to taste


Method: 

1. Roughly cut the bread into blocks.
2. Cut the sausage into 1cm pieces.
3. Mix the bread, sausage, grated cheese, parsley all together.
4. Transfer this mixture into your oven dish / or smaller dishes.
5. Beat your eggs together and add some milk to it. (Like when you make scramble eggs)
6. Pour the egg-mixture over the bread and sausage mixture.
7. Add salt 'n pepper to taste.

Oven bake now (uncovered) at 180 deg.C until done... about 20min. But test it first - eggs can be tricky!


.... Before baking.


... After baking.


... Serve with some veges and salad. 

And, of course, I don't need an excuse to have a glass of wine with supper!
Enjoy.


Thursday, 20 February 2014

Time is relative... Fish Braai.

When you are busy, time flies. And when you sit still and do nothing, time seems to tick over slowly. Right!? Lazy days are meant for fish braai's...


Fish Braai

This is one of my all-time favourite meals... fish over hot coals. It always brings back my best childhood memories...
And it is so easy to prepare!!

NB RULE: Buy FRESH fish from the market / harbour that they caught that morning or, even better, catch your own! I usually buy my fish at the harbour - fresh Hake (Stokvis).

Firstly, you would need some nice, warm coals. So start up your braai - drink a beer or a glass of Chenin Blanc - relax, watch the flames...
Later, maybe a while later... after adding more wood and just relaxing - add some charcoal, in case you don't have good coals.

Then, mix melted butter (salted) with fresh, crushed garlic, salt, pepper (to taste). Place your fish, skin down, on a big sheet of foil. I usually spray the foil with a "non-stick" spray. 
Brush your butter mixture liberally over the white meat of the fish. 
Then add your spices... I like it plain and simple (salt and pepper), but on this specific day, I used "Ina Paarman's Lemon and Rosemary Seasoning." 


Then, onto the hot coals.... 
You can wrap the fish in the foil. I just leave mine open.
Fish cook quite fast, so keep an eye on it. The fish is ready when it flakes easily!


Oh, sorry!! I never took a photo of the salad, savoury rice and pumpkin fritters I made with the dish.... I couldn't wait to eat :-). It was so, so good!! 


No, these fillets are not left-overs.... they were eaten not long after I took this photo!


Enjoy!


Thursday, 12 September 2013

Shirlene's Cheesecake

 With no cheese...

Since Shirlene, a very close friend of mine, gave me this recipe, it has always made a 'wow' impression on people. I've added pineapple pieces to the recipe, blueberries, strawberries, etc. 

Usually I would make this desert in a pie dish, but not this time! I got out my muffin pan and decided to make each person their own portion.
The German student staying with us for 3 months, Nadine, wasn't so sure that I'll be able to lift each portion out of the form without it breaking apart... I wasn't so sure either ;-).

But I was up for the challenge!!! And it came out really good and tasting even better!

Ingredients:

Crust:

1x packet Tennis biscuits
100g butter OR white baking margarine

Filling:

1x tin Condensed Milk
250ml fresh Cream (refrigerated... it must be cold)
1/3 cup freshly squeezed Lemon juice

Method:

Crust:

NB. Spray your dish / pan / glass form with a non-stick spray.

Crush the Tennis biscuits, so that it looks like bread crumbs (no pieces). Microwave the butter / margarine for 10sec or so, just to get it soft enough to mix easily into the crushed biscuit. When it's all mixed in really well, press it firmly into your pie dish / muffin pan / desert glass... Then place the crust into the refrigerator while making the filling.

Filling:

Add the condensed milk and fresh cream into a mixing bowl and mix together with an electric mixer on medium speed. Now slowly add your lemon juice. The mixture will slowly stiffen up a bit. Remember to taste the mixture... it must not taste too sour. Usually a 1/3 cup is just enough.
Keep mixing for another 30 seconds.
The consistency of the mixture, should look like really soft ice cream or a milkshake.

Note: You can now also add blueberries or strawberries, etc to the mix, BUT remember to drain the fruit really well OR pat dry with a kitchen paper towel.

Spoon your mixture over the ready made crusts and place them back into the fridge for 30 minutes or more. The mixture will set in the fridge.

If you can make this desert a day before - I would recommend it. The crust absorbs some of the filling juices without it becoming soggy. 

Oh yum!

Pressing in the filling.
Photo by Elaine Louw
Adding the filling.
Photo by Elaine Louw

Some fresh strawberries on-top.
Photo by Elaine Louw

Eating time.
Photo by Elaine Louw


Monday, 9 September 2013

Cowboy Chow

Makes me think of cowboy movies!


It's been more than 10 years since I first tasted this dish. I remember it so well, because a co-worker of mine, Eben, made it one lunch time... to impress the boss. Of course, it was a big hit and the boss insisted on eating Cowboy Chow at least once a month.

And yes... I got the recipe from Eben, but at a price! I had to prepare the next week's lunch.
It was worth the effort. 

I make this chow quite often - especially in winter! Quick and easy to make!

Ingredients:

1x tin baked beans
1x tin butter beans
1x tin kidney beans
1x tin french style cut, green beans
1x tin tomato and onion stew

1x pack 200 - 250g bacon, cut into bits
1x onion
Some garlic.
Chillies to taste OR Cayenne pepper (not compulsory)
Salt and pepper to taste.

Method:

Finely chop the onion and garlic and saute in a little bit of oil in a medium size pot. Add the bacon and fry until nearly cooked. Throw off the water from the butter beans, green beans and kidney beans. Add all the tinned ingredients to the pot and stir it all together. Cook on medium heat for about 10 minutes. Add some water if you need to. Now, add your chillies / cayenne pepper / salt and pepper and cook for a further 5 minutes.

Serve hot or cold. On it own or as a side dish.

Note: I usually add 1-2 chillies OR 1/2 teaspoon of cayenne pepper. Just for a little bit of a bite!!

And, of course, it tastes really good without the chillies / cayenne pepper too. Enjoy!!

Photo by Elaine Louw


Sunday, 1 September 2013

The Sandwich...

The Plain Sandwich - Gourmet Style

I love it when we braai (bbq). There is always some steak left-over which are fantastic for some plain old "sarmie's". Although Andre knows that sometimes I can't help myself and turn our sandwiches into something... else.

Well, I didn't have any fancy bread left in the bread bin (I've got kids you see), so the plain Low GI white bread had to do. Toast the bread, caramelise some onion and cut the steak into 2-3mm thick slices. Spread the toast with "Colman's, Country Cape Mustard", before placing everything else on top... I even added cheese!

Steak SandwichPhoto by Elaine Louw


Monday, 15 July 2013

For the Love of Food.

Why Food?

Food... -eating, -drinking, -for thought, -for the soul.

One of my most favourite things to do and experience: cooking, baking, tasting, smelling, feeling, listening, seeing, reading, learning, thinking and with time, intuition.

The result - I have something to say about this lovely pass-time... food (ing), that is! 

And I hope you enjoy reading my blog as much as I enjoyed trying out a new recipe!

E.

"Sharing food with another human being is an intimate act that should not be indulged in lightly." 
[M.F.K. Fisher An Alphabet for Gourmets]


Lemon Cheese Cake with Seasonal Fruit
Photo by: Elaine Louw